Raising a Family on a Budget

Home Economics for Real Life

  • Facebook
  • Instagram
  • Pinterest
  • RSS
  • Twitter

30-Second Homemade Mayo

*Sponsored Post.  I received free Davidson’s Safest Choice Eggs in exchange for my post.  Post contains affiliate links.

I have always been a firm believer in homemade tastes better than store bought – cookies, bread, jam, and yes even homemade mayo!  
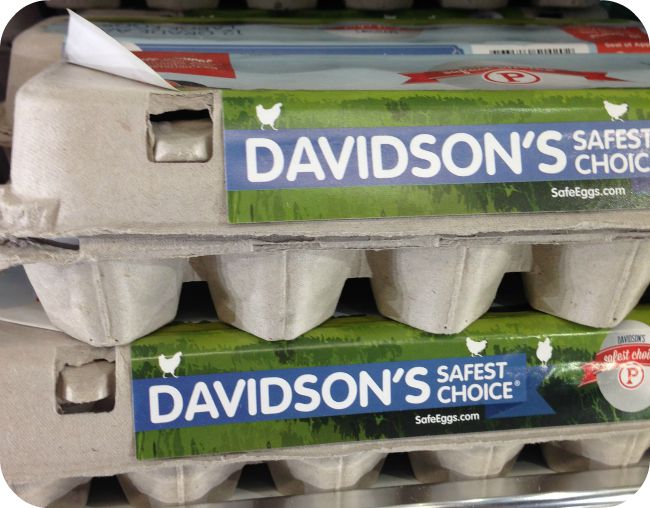
davidson's safest choice pasteurized eggsThere have been a few things that have kept me from making homemade mayo in the past, the first being that it contains raw egg.  Enter Davidson’s Safest Choice Pasteurized Eggs.  This isn’t pasteurized “egg product” in a carton, but rather real, in-shell large eggs that have been pasteurized to eliminate the risk of Salmonella in eggs before you even bring them home to your kitchen.  And you know what that means?  When you use Davidson’s Safest Choice Pasteurized Eggs you can eat your raw cookie dough, homemade mayo, homemade Caesar salad dressing, and even your sunny-side up fried eggs without fear – even if you are pregnant or a young child!  

Once the egg hurdle was taken care of, my next issue was how long it can take to build your emulsion and s-l-o-w-l-y add in the oil.  This process could easily take 15-20 min or more, depending on the strength of your whisking arm.  Here’s where my stick-blender saved the day.  I have a Braun Hand Blender that’s about 12 years old, so here is the link to the “new model”.  

Davidson’s Safest Choice Pasteurized Eggs + Braun Hand Blender = 30 Second Homemade Mayo [Read more…]
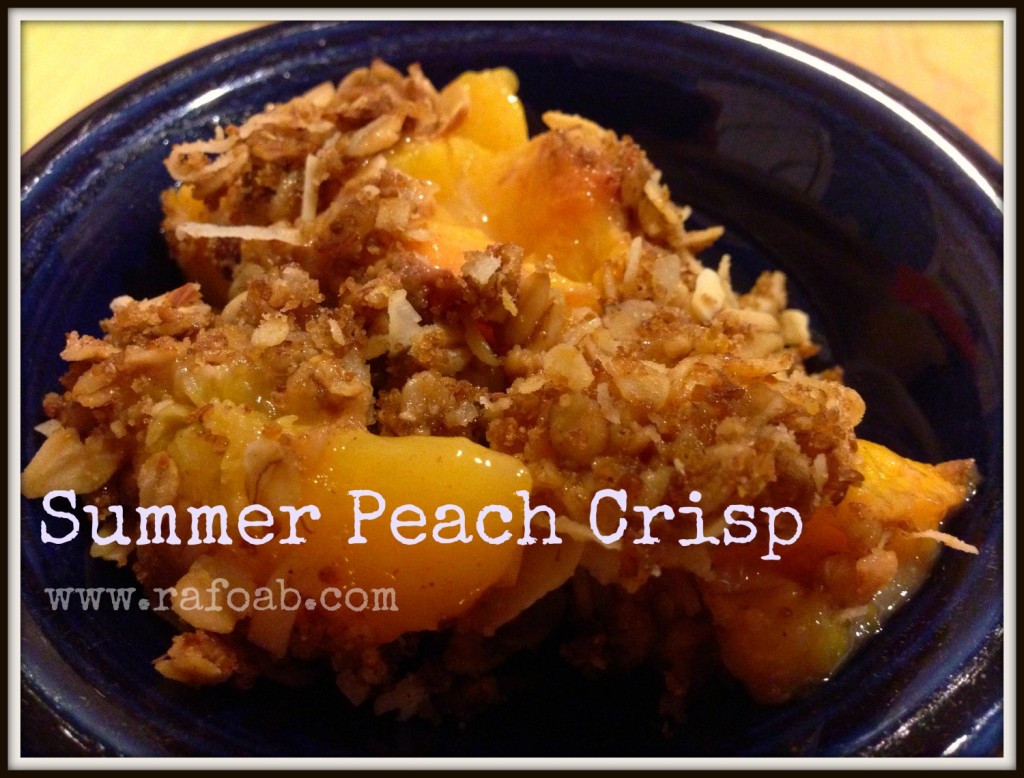
Peach Season is Upon Us! Summer Peach Crisp Recipe

PeachCrisp

Last week, I received a long awaited email from Schober Orchards in Monroeville, NJ.  It announced that their home market would be opening for the season on Friday, July 11 – and the reason for the opening – PEACH SEASON IS HERE!

I absolutely love Jersey Fresh Peaches, and for the last decade (possibly longer) our family has gotten peaches from Schober Orchards.  Before I could even email my parents to make plans to head down this week some time, my father sent me a text saying he was going on Saturday, and how many peaches did I want.  He knows me well. 

So on Sunday, my parents came to visit, and dropped off about a dozen of the most beautiful peaches – soft and fuzzy, some still with leaves on them – and the aroma was the essence of summertime.

I couldn’t help myself, and immediately put together a quick Summer Peach Crisp for dessert.  The children and I enjoyed it so much, that the leftovers then became breakfast.  Its fruit, oats, nuts – all breakfast food – so I figured why not! 

Philadelphia Style Vanilla Ice Cream

And if you want to have your Summer Peach Crisp a la Mode, and really who wouldn’t want to add ice cream to just about everything this time of year,  then you should also check out this recipe for Philadelphia Style Vanilla Ice Cream.  It was so easy to throw together with ingredients that we already had on hand, and really was a nice creamy compliment to the warm peach crisp.

Summer Peach Crisp
2014-07-16 13:31:37
Serves 6
Write a review
Save Recipe
Print
Cook Time
45 min
Cook Time
45 min
Fruit
  1. 6 cups of fresh sliced peaches
  2. 1 Tbsp AP Flour
  3. a sprinkle of cinnamon
Topping
  1. 1/2 cup of oats
  2. 3/4 cup of AP flour
  3. 1/4 cup of coconut
  4. 2 T sliced almonds
  5. 2 T flax meal
  6. 1/2 cup packed brown sugar
  7. 1/4 tsp cinnamon
  8. 1/3 cup butter, melted
Instructions
  1. Preheat your oven to 375.
  2. Mix the sliced peaches with the flour & cinnamon. Pour the fruit mixture into a 9x9 baking dish.
  3. Combine all of the topping ingredients together. You may need to use your hands to fully incorporate the butter. Once combined, pour over top of the fruit.
  4. Bake for 40-45 minutes, or until the fruit is bubbly and the crisp topping is evenly browned. Serve warm or at room temperature.
Notes
  1. If almonds aren't your thing, you can include whichever nuts you choose. Pecans also pair nicely with the peaches.
Raising a Family on a Budget http://www.raisingafamilyonabudget.com/

Philadelphia Style Vanilla Ice Cream

Philadelphia Style Vanilla Ice CreamAn entire month dedicated to the celebration of ice cream?! Yes please!

July is National Ice Cream Month, and I’ve partnered with Nielsen-Massey Vanillas to bring you one of my favorite vanilla ice cream recipes.

Nielsen-Massey Vanillas is still a family run business, operated by the 3rd generation of Nielsens. They offer three different types of vanilla: Madagascar Bourbon, Mexican, and Tahitian, and all products are Gluten-Free, Allergen-Free, GMO-Free and Kosher.

Usually, I go for chocolate ice cream, but when it comes to topping a fruity dessert like peach crisp, vanilla ice cream is the only way to go. Its delicious, and pairs beautifully with so many other flavors turning a regular dessert into something extraordinary.

Philadelphia style ice cream is one of the simplest to make and uses just a few basic ingredients – milk/cream, sugar, and flavoring – all things I have on hand in my kitchen. With a few basic ingredients, you can make your own homemade ice cream whenever that sweet tooth gets the better of you, and since it is homemade you control the quality of the ingredients.

For this ice cream, I am using my favorite – Madagascar Bourbon Vanilla. This is my go to vanilla for that classic vanilla flavor – Sweet, creamy and mellow with velvety after-tones.


Philadelphia Style Vanilla Ice Cream
2014-07-15 13:05:30
A deliciously creamy vanilla ice cream.
Write a review
Save Recipe
Print
Ingredients
  1. 2 cups Half & Half
  2. 1 cup of milk
  3. 3/4 cup sugar
  4. 1 Tbsp Nielsen-Massey Madagascar Bourbon Vanilla
Instructions
  1. Mix the ingredients together in a bowl. Make sure the sugar is fully dissolved so that your ice cream is not gritty. Chill the ice cream base for at least 3 hours.
  2. Prepare your ice cream maker according to the manufacturer's instructions. Add your ice cream base to bowl of your ice cream maker and process until it reaches the desired creaminess.
  3. Serve immediately, or transfer into a container and freeze for 3-4 hours until it firms up.
Notes
  1. Do not use homemade vanilla extracts when making ice cream. The alcohol content of homemade extracts is higher, and will prevent the ice cream from freezing properly.
Raising a Family on a Budget http://www.raisingafamilyonabudget.com/
     

Enter below for a chance to win a bottle of Nielsen-Massey Madagascar Bourbon Vanilla.

Entry-Form


Affiliate Disclaimer

{Recipe} Homemade Buffalo Sauce & Buffalo Chicken Grilled Cheese

I am having some very odd cravings lately, and today’s hit around 7am – Buffalo Chicken!  I don’t care for most prepared buffalo sauces because they taste very vinegary to me, so I opted to make my own.  Here is the recipe for anyone looking to try a new Buffalo Sauce – maybe in time for the Superbowl this weekend!

:: Buffalo Sauce

  • 1/2 c Frank’s Red Hot
  • 1/3 c butter
  • 1 tsp Garlic Powder (add more if you like it garlicy)
  • 1 bay leaf
  • 1 1/2 tsp Worcestershire Sauce
  • 1/4 tsp Cayenne Pepper (more if you like heat, I only used a 1/4 this time but will add more when I make this again)

Melt the butter in a small pot.  Reduce the heat to low.  Add the spices and stir them in so you don’t get lumps.  Add the bay leaf.  Then, carefully pour in the Frank’s Red Hot.  If the butter is boiling before this point, remove from heat so that it doesn’t bubble out of the pot and burn you.  Whisk everything together and allow to simmer 1-2 minutes.  Remove the bay leaf, and use on wings or as a dipping sauce or in your favorite recipe!

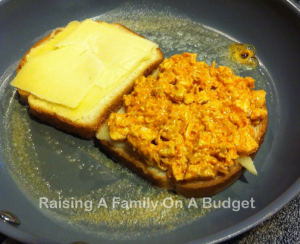
For me, that became a Buffalo Chicken Grilled Cheese!

buffalo grilled cheese

I was making a buffalo chicken grilled cheese & a regular grilled cheese which is why there are 2 sandwiches in the photo.

:: Buffalo Chicken Grilled Cheese

  • 1 cooked chicken breast, diced or shredded
  • enough buffalo sauce to coat the chicken
  • 4 slices of sourdough bread
  • Bleu Cheese Dressing (I like Marzetti’s Ultimate Bleu Cheese)
  • Bleu Cheese crumbles (optional) – to taste
  • 8 slices of sharp cheese – I used Cooper Sharp from the deli
  • butter for cooking

In a bowl, combine the cooked chicken breast and the buffalo sauce to coat.  Stir in the bleu cheese crumbles (if using) and 1 spoonful of the bleu cheese dressing.  If you don’t care for bleu cheese dressing, you could use ranch or mayo.  Stir so everything is mixed together.

Build your sandwich.  Two slices of cheese on the bottom, a layer of buffalo chicken, and 2 more slices of cheese on top.  Butter the top slice of bread, but don’t put on the top slice  just yet.

In a frying pan, melt some butter.  Place the open-face sandwiches in the pan and cover with a lid.  Cook on med-low until the cheese starts to melt and the bread is getting toasty. Put the second piece of bread on each sandwich, and flip.  Cook on the second side until the bread is toasty and all of the cheese is melted.

Allow sandwiches to cool for 1-2 minutes before slicing.  Serve with additional bleu cheese dressing for dipping.  I never said this was healthy or low fat.  

You can also make mini sandwiches using the appetizer breads that you can find at the deli and have a spin on the usual buffalo wings for the big game!


Recipe: Cheesy Sausage Muffins

Cheesy Sausage Muffins

Last winter, I received the $5 Dinner Mom’s Breakfast & Lunch Cookbook, and this was one of the first recipes I tried out in writing my review of the book.  This has quickly become one of my favorite cookbooks, and my favorite freezer friendly breakfast.

As we prepare to receive our side of beef in the next few weeks, I am busily using up items in the freezer.  Today I decided to use up the sausage and cheddar cheese that have been in there.  This recipe scales beautifully.  I made a triple batch of these with the intention of freezing them for breakfasts for the next 2 weeks.

Cheesy Sausage Muffins
2014-08-14 17:38:30
Yields 12
Write a review
Save Recipe
Print
Ingredients
  1. 1/2 lb bulk pork breakfast sausage
  2. 2 cups of AP flour
  3. 2 tsp baking powder
  4. 1 tsp salt
  5. 2 eggs
  6. 1/4 cup oil
  7. 1 cup milk
  8. 1 cup shredded sharp cheddar cheese
Instructions
  1. Preheat the oven to 350 degrees.
  2. Line muffin tin with paper liners.
  3. In a large skillet, brown the sausage, crumbling as you cook it.  Drain and set aside to cool.
  4. In a large mixing bowl, whisk together the dry ingredients.  Make a well in the middle, and pour in the eggs, oil and milk.  Mix until a batter just forms.  Fold in the sausage crumbles and shredded cheese.
  5. Fill the prepared muffin wells to the top with batter.  Bake in the preheated oven for 18-22 minutes, or until they begin to turn golden on top.
  6. Serve warm with fresh fruit for breakfast or with soup for a light lunch or dinner.
Notes
  1. To freeze the muffins, make sure they cool completely, then place in a freezer bag. Place in the freezer. When you are ready to have the muffins, allow to defrost on the counter, and then warm them up in either the oven or microwave.
Raising a Family on a Budget http://www.raisingafamilyonabudget.com/

Summer Sangria Recipe


I love to entertain and have people over.  I don’t like to spend a lot of money just to be able to visit with friends and family.

One way to save money when you are entertaining is to offer one “house drink” instead of a full bar. I love spiked punches and sangria because they don’t contain all alcohol and you can use the less expensive items to stretch the volume, such as sodas and juices. You can also often get away with a less expensive wine and still have a delicious result without breaking the bank.

For our 4th of July BBQ, I will be making a pitcher of Sangria.  I am going to Trader Joe’s today, so I will be picking up 2 bottles of “2 Buck Chuck” for today’s batch of Sangria.  I like my Sangria on the sweeter side, so I often make this with both white zinfandel, and either Merlot or Cabernet.  However, you can use whatever you like and have on hand.

This is my favorite Sangria recipe.  You can modify it to meet your tastes and it scales up for a crowd very easily.  I have even been known to add a little more of the soda to get it to stretch just a tiny bit farther and no one has ever been able to tell.

:: Sangria Recipe

3 cups of wine
1 1/2 cups Sprite or 7-up
1 1/2 cups orange juice
1 orange thinly sliced
1 lime thinly sliced
1 lemon thinly sliced
1/2 cup brandy – I don’t usually have this on hand, and it is just as good without it
1/4 cup sugar
2 tablespoons Cointreau
2 tablespoons grenadine
2 tablespoons fresh lemon juice
2 tablespoons fresh lime juice
ice cubes

Stir wine, soda and orange juice, 8 lime slices, 8 lemon slices, orange slices, brandy, sugar, Cointreau, grenadine, lemon juice and lime juice in a large pitcher to combine.  Chill for at least 30 minutes.  Serve in wine glasses garnished with additional citrus slices.

Serves 8.

Toffee Popcorn

I enjoy baking and cooking.  I am not intimidated by different ingredients or techniques.  So this past Christmas, I decided to stray from the usual cookie marathons, and make candy as gifts instead.  The most popular treat I made this year…Toffee Popcorn!

::Ingredients

  • 10 cups popped popcorn (12 cups if not using nuts)
  • 1 cup pecan halves, toasted (optional)
  • 1 cup whole unblanched almonds, toasted (optional)
  • 1 1/2 cups packed brown sugar
  • 1 cup butter
  • 1/2 cup honey
  • 1/2 teaspoon cream of tartar
  • 1/2 teaspoon baking soda
  • 1/2 teaspoon vanilla extract

In a large bowl, combine popcorn and nuts.

In a heavy saucepan, combine the brown sugar, butter, honey and cream of tartar; stir until the butter is melted and the sugar is dissolved. Cook, without stirring, over medium heat until a candy thermometer reads 300°-310° (hard-crack stage).

Remove from the heat.  Stir in vanilla and baking soda until mixture is light and foamy (be careful – when you add the vanilla it will spontaneously boil, so pour it in and step back to avoid the spatter). Immediately pour over popcorn mixture; toss gently using two buttered spatulas or wooden spoons. Spread into two baking pans lined with Silpats or buttered parchment. Press gently to flatten. Cool completely. Break into pieces.

Yield: about 2 quarts.

NOTE: There is a reason that sugar work is referred to as culinary Napalm.  Be careful when cooking and working with your toffee.  Keep a bowl of cold iced water near by at all times so if you get any of the toffee on you, you can instantly plunge your hand into the water.

Homemade Beef Stock

I’ve decided to add a new feature to Raising A Family On A Budget called Tasty Tuesday.  On Tasty Tuesday, I will be sharing a recipe that I have recently made for my family.  This week’s recipe is a basic, but something I have never made before…Beef Stock.

As I mentioned in the fall, we purchase our beef by the side from a local farm about 20 minutes from our home.  The cattle are grass fed and raised following completely organic measures.  We love buying our beef this way, but there is just one problem…No room in the freezer for anything else!

I am completely out of chicken and want to pick up a few packages to have on hand for the remainder of the month, but there is no room in the freezer because of all of the beef.  My fix…take the large box of soup bones & make beef stock!

I have a lot of soup bones, but you can scale this recipe to meet the needs of your family and the amount of stock you want to make.

:: Beef Stock

15 lbs of beef shank bones
4 large carrots, large chop
4 small onions, large chop
5 ribs of celery, large chop
5 cloves of garlic, cut in half
1/2 cup of red wine (whatever you have on hand will work or use water)
9 qts water (36 cups)
1 Tbsp kosher salt
25 peppercorns
6 bay leaves
1 Tbsp dried thyme, crushed
2 Tbsp dried parsley, crushed

Place your soup bones in a shallow pan and roast in a 450 degree oven for 40 minutes, turning once, to brown the meat/bones.

Prepare all of your additional vegetables, herbs, and spices in a large bowl.

When the bones are done roasting, put them in a large stock pot (at least a 10 qt pot).  Deglaze the roasting pan with the red wine, making sure to scrape up all of the browned bits on the bottom of the pan.  Pour the wine and drippings into the stock pot.

Add all of your vegetables, herbs and spices.

Fill the pot with 9 qts of water and put on high heat until it comes to a boil.  Turn the heat to low, and simmer covered for 3 1/2 hours.

Remove the soup bones, and if desired, cut off the meat for later use.

Strain the broth to remove the vegetables and other bits.  Use either a fine sieve or a colander lined with a double layer of cheese cloth.

To clarify the stock, mix together 1 egg white and 1/2 a cup of water.  Pour into hot stock & stir.  Bring to a boil.  As soon as a boil is reached, remove from the heat and allow to sit for 5 minutes before straining through a double layer of cheese cloth.

Store the stock in the fridge for up to 3 days or in the freezer for up to 9mos.

Makes about 8 qts of stock & 4-6 cups of meat depending on the amount of meat on your bones. And, don’t let those bones go to waste…doggies love them!


Homemade Breakfast Sausage

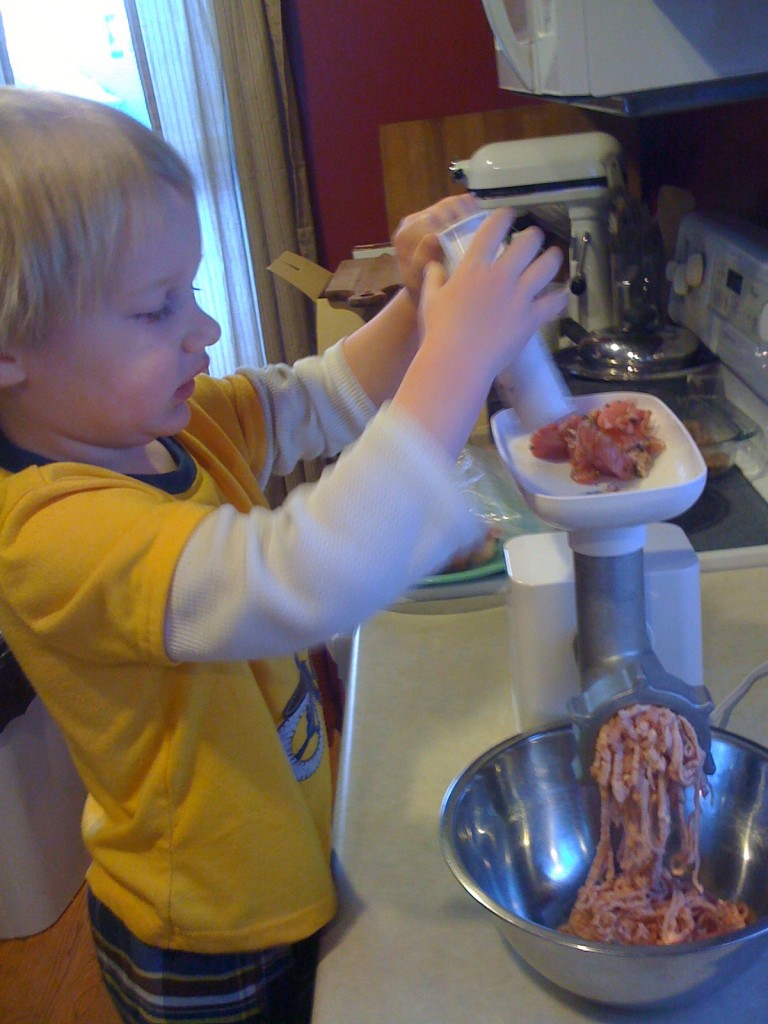
Homemade sausageIn preparing to write a review for The $5 Dinner Mom Breakfast and Lunch Cookbook, I went grocery shopping for a few key essentials.  I had left my purse at home, and only had $40 cash in my pocket, so spending $4+ for a 1 pound package of bulk breakfast sausage was out of the question.  I quickly looked up a recipe from my phone on how to make homemade sausage and opted on buying 2lbs of pork at $1.99/lb and a packet of marjoram for 99 cents to make my own instead!

:: Homemade Breakfast Sausage

2 teaspoons dried sage
2 teaspoons salt
1 teaspoon ground black pepper
1/4 teaspoon dried marjoram
1 tablespoon brown sugar
1/8 teaspoon crushed red pepper flakes
1 pinch ground cloves
2 pounds pork – I used very lean boneless loin chops

Cut the pork into small pieces, about the size of dice.  Place in a large zip top bag, and add all of the herbs, spices, and sugar.  Massage the meat in the bag so that all of the spices are mixed in and covering the bits of pork.  Stash in the refrigerator for at least 2 hours.

Assemble your meat grinder using the coarse grind plate.  Put all of the pork in the hopper on top of the grinder.  Slowly push the meat through the shoot, and catch the already ground pork in a bowl.  Do this at least twice to break down the meat.

Then form into patties and fry in a little oil  (it is very lean meat) until browned and cooked through, or cook as crumbles for use in recipes.  Two pounds of cooked sausage crumbles is approximately 5 cups of crumbles.

If you do not have a meat grinder, purchase 2lbs of ground pork, mix the spices into it, and allow to chill for at least 2 hours.  Proceed as outlined in the recipe.

This makes a very mild flavored breakfast sausage, but it is absolutely delicious, and I will make it again.

Peppermint Hot Cocoa Recipe

Need something to do with all of those candy canes from Christmas?  Want a tasty way to warm up after shoveling the snow?  Make yourself some peppermint hot cocoa!

Homemade Peppermint Hot Cocoa
4 cups milk
2 ounces chocolate chips – the minis melt faster, but all work well, even Hershey’s Kisses in a pinch!
4 peppermint candy canes, crushed to powder
1 cup whipped cream
4 small peppermint candy canes

In a saucepan, heat milk until hot, but not boiling. Whisk in the mini chocolate chips and the crushed peppermint candies until melted and smooth. Pour hot cocoa into four mugs, and garnish with mounds of whipped cream and Christmas sprinkles. Serve each with a mini candy cane stirring stick.

If you don’t have the above ingredients on hand, but still want a mug of peppermint hot cocoa, just crush up a left over candy cane from Christmas, and stir it into your favorite cocoa mix.  If you were given peppermint bark, stir a piece of that into your hot cocoa instead for an extra chocolatey pepperminty kick!

All variations of this cocoa are amazing!

Copyright © 2025 · Lifestyle Pro Theme on Genesis Framework · WordPress · Log in