Raising a Family on a Budget

Home Economics for Real Life

  • Facebook
  • Instagram
  • Pinterest
  • RSS
  • Twitter

30-Second Homemade Mayo

*Sponsored Post.  I received free Davidson’s Safest Choice Eggs in exchange for my post.  Post contains affiliate links.

I have always been a firm believer in homemade tastes better than store bought – cookies, bread, jam, and yes even homemade mayo!  

davidson's safest choice pasteurized eggs
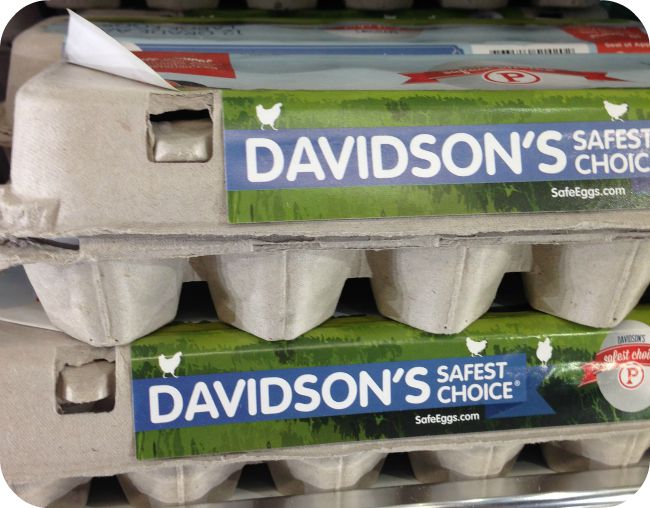
There have been a few things that have kept me from making homemade mayo in the past, the first being that it contains raw egg.  Enter Davidson’s Safest Choice Pasteurized Eggs.  This isn’t pasteurized “egg product” in a carton, but rather real, in-shell large eggs that have been pasteurized to eliminate the risk of Salmonella in eggs before you even bring them home to your kitchen.  And you know what that means?  When you use Davidson’s Safest Choice Pasteurized Eggs you can eat your raw cookie dough, homemade mayo, homemade Caesar salad dressing, and even your sunny-side up fried eggs without fear – even if you are pregnant or a young child!  

Once the egg hurdle was taken care of, my next issue was how long it can take to build your emulsion and s-l-o-w-l-y add in the oil.  This process could easily take 15-20 min or more, depending on the strength of your whisking arm.  Here’s where my stick-blender saved the day.  I have a Braun Hand Blender that’s about 12 years old, so here is the link to the “new model”.  

Davidson’s Safest Choice Pasteurized Eggs + Braun Hand Blender = 30 Second Homemade Mayo [Read more…]

Philadelphia Style Vanilla Ice Cream

Philadelphia Style Vanilla Ice CreamAn entire month dedicated to the celebration of ice cream?! Yes please!

July is National Ice Cream Month, and I’ve partnered with Nielsen-Massey Vanillas to bring you one of my favorite vanilla ice cream recipes.

Nielsen-Massey Vanillas is still a family run business, operated by the 3rd generation of Nielsens. They offer three different types of vanilla: Madagascar Bourbon, Mexican, and Tahitian, and all products are Gluten-Free, Allergen-Free, GMO-Free and Kosher.

Usually, I go for chocolate ice cream, but when it comes to topping a fruity dessert like peach crisp, vanilla ice cream is the only way to go. Its delicious, and pairs beautifully with so many other flavors turning a regular dessert into something extraordinary.

Philadelphia style ice cream is one of the simplest to make and uses just a few basic ingredients – milk/cream, sugar, and flavoring – all things I have on hand in my kitchen. With a few basic ingredients, you can make your own homemade ice cream whenever that sweet tooth gets the better of you, and since it is homemade you control the quality of the ingredients.

For this ice cream, I am using my favorite – Madagascar Bourbon Vanilla. This is my go to vanilla for that classic vanilla flavor – Sweet, creamy and mellow with velvety after-tones.


Philadelphia Style Vanilla Ice Cream
2014-07-15 13:05:30
A deliciously creamy vanilla ice cream.
Write a review
Save Recipe
Print
Ingredients
  1. 2 cups Half & Half
  2. 1 cup of milk
  3. 3/4 cup sugar
  4. 1 Tbsp Nielsen-Massey Madagascar Bourbon Vanilla
Instructions
  1. Mix the ingredients together in a bowl. Make sure the sugar is fully dissolved so that your ice cream is not gritty. Chill the ice cream base for at least 3 hours.
  2. Prepare your ice cream maker according to the manufacturer's instructions. Add your ice cream base to bowl of your ice cream maker and process until it reaches the desired creaminess.
  3. Serve immediately, or transfer into a container and freeze for 3-4 hours until it firms up.
Notes
  1. Do not use homemade vanilla extracts when making ice cream. The alcohol content of homemade extracts is higher, and will prevent the ice cream from freezing properly.
Raising a Family on a Budget http://www.raisingafamilyonabudget.com/
     

Enter below for a chance to win a bottle of Nielsen-Massey Madagascar Bourbon Vanilla.

Entry-Form


Affiliate Disclaimer

{Frugal Makeover} DIY Cran-Apple Walnut Oatmeal Packets

Until I few years ago, I absolutely hated oatmeal.  It was fine as an ingredient in cookies or the topping in a fruit crisp, but there was no way you could get me to eat a bowl of the stuff for breakfast.  It wasn’t a taste thing, but rather a texture issue.  I periodically tried to eat oatmeal because I knew it was good for me, but it just wasn’t happening.

Then, in 2012, I was talking to a friend about running, and he suggested I eat oatmeal for breakfast because it will give me the sustainable energy to get through an early morning run.  He then told me about these little oatmeal cups that he’d pick up at the store and keep in his locker for a quick meal on the go.

These little oatmeal cups - usual price $1.79 ea

These little oatmeal cups – usual price $1.93 ea

So, I figured I would be brave, and pick up a few of these little oatmeal cups at the grocery store.  But that price!  Ouch!  Less than 3 oz of oats, dried fruit, & nuts for almost $2 (over $2 depending on the store).  Well, it was an experiment to see if I even like the stuff, so I did it.  And you know what – these little oatmeal cups aren’t half bad.

So I investigated the label – WHOLE GRAIN ROLLED OATS, MULTI GRAIN BLEND (WHOLE GRAIN ROLLED OATS, ROLLED BARLEY, WHOLE GRAIN ROLLED RYE), DRIED SWEETENED APPLES (APPLES, SUGAR), DRIED SWEETENED CRANBERRIES (CRANBERRIES, SUGAR), WALNUTS COATED WITH ROSEMARY EXTRACT, BROWN SUGAR, DEHYDRATED APPLES (APPLES, SUGAR, FRUCTOSE, CINNAMON, MALIC ACID, SODIUM SULFITE FOR COLOR RETENTION), WHOLE GRAIN ROLLED WHEAT, SALT, CINNAMON, NATURAL FLAVOR.

In the grand scheme of things, not a bad list of ingredients, most of which you can purchase separately at the market.  I am always curious about “natural flavor” though.  The one thing that made me curious though was the multi grain blend; this must be the reason why I wasn’t having the same texture issue with this oatmeal as I had in the past with plain oatmeal.  The multi grain cooks different and doesn’t get all gummy.

Now that I realized that I liked the Apple Walnut Oatmeal, it was time to figure out how to make it cheaper, and recently I decided to finally write down the quantities that I was using in order to make these:

Cran-Apple Walnut Oatmeal

Cran-Apple Walnut Oatmeal Packets

Since I am breasfeeding, it is so important that I eat breakfast each day or else the headache I have by 10am is ridiculous!  Having these oatmeal packets on hand in the pantry not only guarantee a no thought breakfast (one I can make while sleep deprived or before having my morning cup of tea), but also is chock full of whole grains and B vitamins which do so many wonderful things for your milk supply.

Each packet contains the following (brand names are only mentioned because its what I have on hand & other brands may be of differing quality):

1/4 cup Country Choice Organic Hot Cereal – Multi Grain ($.24)
1/8 cup Bob’s Red Mill Rolled Thick Oats ($.06)
1 Tbsp Bob’s Red Mill Organic Flax Seed Meal ($.05)
1/8 cup dried cranberries – chopped fine ($.13)
1/8 cup chopped walnuts ($.29)
4 dried apple rings, chopped ($.44 store bought – I dry my own with apples we were given)
cinnamon

When I’m ready to prepare breakfast, I dump one packet into a deep sided bowl.  Add 3/4 cup water  and 1 rounded teaspoon of coconut oil ($.09).  Microwave on high for 1-2 minutes.  Stir and cover (I just put a plate on top).  Let sit for 2-3 minutes.  Add a healthy drizzle of raw honey or real maple syrup, and enjoy!

Breakfast is served!

Breakfast is served!

Total – $1.30 per packet without coupons or bargain shopping (I bet we could easily get that to under $1 a packet with a little extra effort) and you get a portion that is almost twice the size of the little cup that you would be buying for $1.93 each!  More food, less money, and you control the quality of the ingredients – That is a HUGE WIN in my book!


Cold/Sinus Relief Fizzing Bath Salts

fizzing bath saltsAfter Steve being sick for the better part of the last month, and then the three kiddos and I getting sick last week, I was doing anything and everything in my power to make us feel better.  One thing that really seemed to help were warm baths, and I figured why not add something to the bath water that can help us to feel better still.

I mixed up a batch of these fizzing bath salts, and they spelled sinus relief for us, but there is nothing saying you can’t change up the essential oils to make your bath salts more relaxing or invigorating, whatever you need and want to do with them.

The fizz in these bath salts is created by the chemical reaction between regular old baking soda (what most of us have on hand for baking and/or cleaning) and citric acid (available in the canning section of your grocery store or online).  Think back to the vinegar and baking soda volcanoes that you made in elementary school; it is the same idea with these salts.

For the salt portion, I like plain Epsom salt, but you can use any combination of Epsom salt, sea salt, or both.

Basic Fizzing Bath Salt Recipecold-sinus relief bath salts

1/4 cup citric acid
1/2 cup baking soda
1 cup Epsom salt
20-30 drops of essential oil

In a bowl, mix together your dry ingredients.  Add 20-30 drops of the essential oils of your choice.  For the cold/sinus relief bath salts, I used a combination of eucalyptus, peppermint, rosemary, & lavender oils.  Stir up the mixture.

If you want to tint your bath salts, you can add 1-5 drops of skin-safe cosmetic grade coloring (found with the soap making supplies in the craft store).  Incorporate the coloring into your salt mixture.

Place your bath salts in an air tight jar.  At bath time, add a handful or two of your bath salts to the warm bath water.

Join the DIY Blogger Project by linking up your Cold/Flu Relief DIY Project below.  If you want to share the DIY Blogger Project on your site, please include the code below!


Toffee Popcorn

I enjoy baking and cooking.  I am not intimidated by different ingredients or techniques.  So this past Christmas, I decided to stray from the usual cookie marathons, and make candy as gifts instead.  The most popular treat I made this year…Toffee Popcorn!

::Ingredients

  • 10 cups popped popcorn (12 cups if not using nuts)
  • 1 cup pecan halves, toasted (optional)
  • 1 cup whole unblanched almonds, toasted (optional)
  • 1 1/2 cups packed brown sugar
  • 1 cup butter
  • 1/2 cup honey
  • 1/2 teaspoon cream of tartar
  • 1/2 teaspoon baking soda
  • 1/2 teaspoon vanilla extract

In a large bowl, combine popcorn and nuts.

In a heavy saucepan, combine the brown sugar, butter, honey and cream of tartar; stir until the butter is melted and the sugar is dissolved. Cook, without stirring, over medium heat until a candy thermometer reads 300°-310° (hard-crack stage).

Remove from the heat.  Stir in vanilla and baking soda until mixture is light and foamy (be careful – when you add the vanilla it will spontaneously boil, so pour it in and step back to avoid the spatter). Immediately pour over popcorn mixture; toss gently using two buttered spatulas or wooden spoons. Spread into two baking pans lined with Silpats or buttered parchment. Press gently to flatten. Cool completely. Break into pieces.

Yield: about 2 quarts.

NOTE: There is a reason that sugar work is referred to as culinary Napalm.  Be careful when cooking and working with your toffee.  Keep a bowl of cold iced water near by at all times so if you get any of the toffee on you, you can instantly plunge your hand into the water.

Homemade Breakfast Sausage

Homemade sausageIn preparing to write a review for The $5 Dinner Mom Breakfast and Lunch Cookbook, I went grocery shopping for a few key essentials.  I had left my purse at home, and only had $40 cash in my pocket, so spending $4+ for a 1 pound package of bulk breakfast sausage was out of the question.  I quickly looked up a recipe from my phone on how to make homemade sausage and opted on buying 2lbs of pork at $1.99/lb and a packet of marjoram for 99 cents to make my own instead!

:: Homemade Breakfast Sausage

2 teaspoons dried sage
2 teaspoons salt
1 teaspoon ground black pepper
1/4 teaspoon dried marjoram
1 tablespoon brown sugar
1/8 teaspoon crushed red pepper flakes
1 pinch ground cloves
2 pounds pork – I used very lean boneless loin chops

Cut the pork into small pieces, about the size of dice.  Place in a large zip top bag, and add all of the herbs, spices, and sugar.  Massage the meat in the bag so that all of the spices are mixed in and covering the bits of pork.  Stash in the refrigerator for at least 2 hours.

Assemble your meat grinder using the coarse grind plate.  Put all of the pork in the hopper on top of the grinder.  Slowly push the meat through the shoot, and catch the already ground pork in a bowl.  Do this at least twice to break down the meat.

Then form into patties and fry in a little oil  (it is very lean meat) until browned and cooked through, or cook as crumbles for use in recipes.  Two pounds of cooked sausage crumbles is approximately 5 cups of crumbles.

If you do not have a meat grinder, purchase 2lbs of ground pork, mix the spices into it, and allow to chill for at least 2 hours.  Proceed as outlined in the recipe.

This makes a very mild flavored breakfast sausage, but it is absolutely delicious, and I will make it again.

Copyright © 2023 · Lifestyle Pro Theme on Genesis Framework · WordPress · Log in